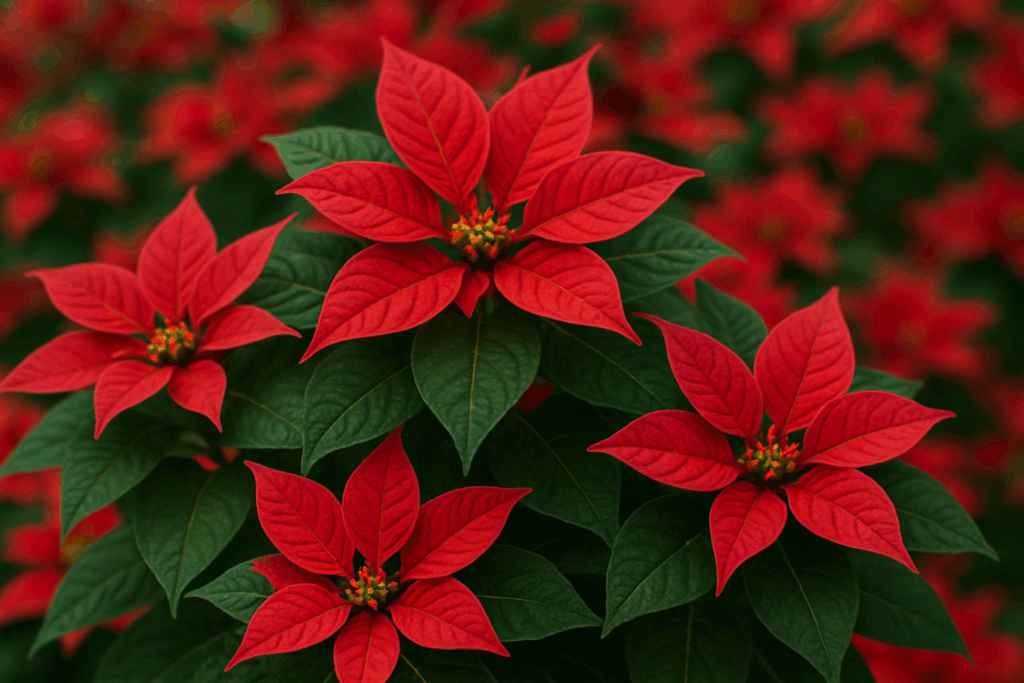
Poinsettias aren’t just for Christmas. With the right care and setup, you can multiply your favorite festive plant year-round without buying new ones. Whether you’re a hobbyist looking to fill your home with vibrant reds and whites or someone eyeing a side hustle, mastering poinsettia plant propagation can be truly rewarding.
I still remember the thrill of my first successful propagation—I didn’t think it would work, but a few weeks later, tiny roots peeked through the potting mix. It was magic, made simple.
Let’s walk through the entire process, from getting your materials ready to creating the perfect growing environment.
🧰 Step 1: Get Your Materials Ready
Before you start, gather everything you’ll need:
- Sharp pruning shears or a sterilized knife
- A clean container or nursery tray
- Hormone rooting powder (optional but helpful)
- Well-draining potting mix
- Spray bottle
- A humidity dome or plastic bag
- Grow lights or access to indirect sunlight
Preparation is key! The smoother your setup, the higher your success rate.
✂️ Step 2: Take Stem Cuttings the Right Way
The golden rule for propagation is to take stem cuttings, remove lower leaves, and root them in a well-draining potting mix, providing indirect sunlight and consistent moisture.
Here’s how:
- Cut a 3–5 inch healthy stem just below a node (where leaves emerge).
- Strip off the bottom 2–3 leaves, leaving a few at the top.
- Dip the cut end in rooting hormone (if available).
- Insert the cutting into your moistened potting mix.
This technique forms the foundation of propagation of poinsettias, ensuring that nutrients go directly to new root formation.
Also Read: Indoor Plant Room: Transform Any Space into a Lush Oasis
🌡️ Step 3: Set Up Optimal Growing Conditions
Poinsettia cuttings will root most successfully in conditions with very high humidity, ideally above 90%. This replicates their native tropical environment and helps prevent them from drying out.
To create optimal greenhouse conditions and management practices, consider the following:
- Cover the cuttings with a plastic dome or zip-lock bag to retain humidity.
- Place them in a bright spot but out of direct sun—indirect sunlight is perfect.
- Mist the leaves daily using a spray bottle.
- Maintain a temperature of 70–75°F (21–24°C).
A simple indoor shelf with a grow light and humidity tray can do wonders if you don’t have a greenhouse.
🪴 Step 4: Monitor and Maintain
Propagation is not a one-time effort. Here’s what to do during the rooting phase (2–4 weeks):
- Check soil moisture every 2 days—never let it dry out completely.
- Look for signs of rot; blackened stems may indicate overwatering.
- As roots form, you may see new leaf growth—that’s your green light for success!
When roots are about an inch long, it’s time to transplant into a small pot with fresh soil and continue your regular care routine.
🌺 Table: Poinsettia Propagation Summary
| Step | What to Do | Why It Matters |
| 1 | Get Your Materials Ready | Ensures a smooth start |
| 2 | Take stem cuttings, remove lower leaves, and root them in a well-draining potting mix | Promotes healthy root development |
| 3 | Provide indirect sunlight and consistent moisture | Prevents drying and promotes photosynthesis |
| 4 | Maintain very high humidity | Encourages root initiation |
| 5 | Monitor regularly | Increases survival rate |
🌼 Personal Tip: What Worked for Me
The first time I tried to propagate, I skipped the humidity dome. Bad idea. My cuttings dried out in two days. The second time, I used a clear food container as a mini greenhouse—and boom, success! Don’t underestimate the power of moisture and patience.
Also, avoid fertilizing until the plant is well-established. Too much too soon can burn the tender roots.
Also Read: Nature’s Sleeping Pills: 10 Plants That Calm Your Mind at Night
🧪 Advanced Tip: Use a Bottom Heating Mat
If you’re looking to level up, use a bottom heating mat. Poinsettias love warmth from below, which speeds up root formation. Combine this with a humidity dome and grow lights for near-commercial success at home.
This tip is often practiced in optimal greenhouse conditions and management practices for high-volume propagation.
Start Your Own Festive Garden
With this guide, you now have all the tools to master poinsettia plant propagation. Remember: success lies in the basics—take stem cuttings, remove lower leaves, and root them in a well-draining potting mix, providing indirect sunlight and consistent moisture. Recreate conditions with very high humidity, and soon enough, you’ll have a whole batch of new plants.
Why not gift your homegrown poinsettias next holiday season? There’s no better feeling than sharing a plant you propagated yourself.
Inspired to try it out? Share your experience or tag the Toronto Garden Book in your journey! 🌱